The January 2010 Daring Bakers’ challenge was hosted by Lauren of Celiac Teen. Lauren chose Gluten-Free Graham Wafers and Nanaimo Bars as the challenge for the month. The sources she based her recipe on are 101 Cookbooks and www.nanaimo.ca.The Nanaimo bar recipe is here.

This month's challenge is a wondrously rich non-bake confection called Nanaimo bar a favourite in Canada which one taster in the forums said was “like fudge on crack”. Yes this recipe is so rich, so fudge-like it is so so sinful that I recommend only 1 inch (25mm) square pieces. There are perfect for any party and they will be the hit! The recipe for the Nanaimo bar is one that won a competition for the best recipe in the town of Nanaimo Canada. Since this is the Daring Bakers' we needed to make the gluten-free Graham wafers (crackers) that were needed for the recipe.
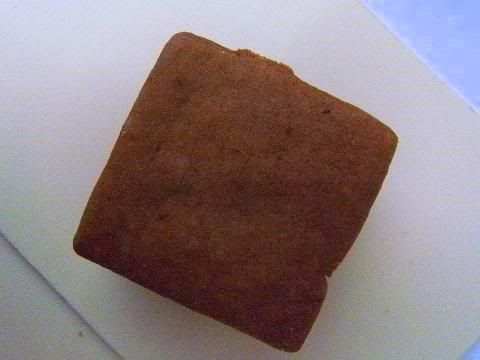
Graham wafers are a standard biscuit (cookie) in America but not available in Australia so I was very interested to make and taste these crackers. I was very surprised as most other Australian DBers that they tasted like very weak ginger-snaps or very mild gingerbread. This recipe yields very crisp and tasty biscuits and you'll need a quarter batch to make the Nanaimo bars. We could make gluten-free or wheat Graham wafers I tried both and surprisingly the gf ones were the best.
Batch #1
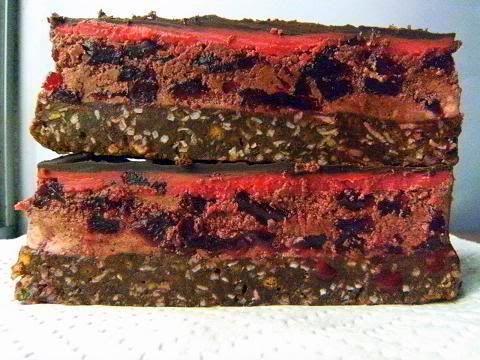
Soured Cherry Nanaimo Bars
I decided to do a sour cherry version of the slice I added an extra layer of soured cherries to the challenge recipe since cherries go so well with all the other flavours in this very very rich bar. I used the gluten-free version.
Notes
1. The dough is very very soft so the best method to use is to roll the dough out using two layers of floured-parchment paper and I found that it was too soft to lift off so I just cut the rolled-out dough into the square shapes and placed the bottom parchment paper onto the baking sheet.
2. After the 25 mins baking time the wafers were still soft on top but became crisp and hard after cooling. They puffed up a lot I just used a clean towel to push the fresh-out-of-oven wafers flat.
3. You need to only make a 1/4 batch of the wafer recipe to make enough crumbs to make the bar.
4. The butter/icing sugar/custard powder layer (the middle layer) whips up to a very light and puffy mixture.
5. Just use volume measurements for the crumbs and the cocoa etc the nature of the bar recipe allows for the use of volumes instead of the normal weight measurements.
6. Australia (Sydney) is so HOT at the moment so the recipe took about seven hours there was a lot of chilling for each of the layers.
7. The resulting bar needs a lot of chilling to be able to be sliced into nice shapes.
8. Most likely the bar will be a little soft if making it in a very hot and humid country like Australia.
9. This bar tasted like the best 'Cherry Ripe' recipe I have very had since there is so much butter and yummy ingredients in the bar wonderful with iced tea on a hot summer's day.
10. I think I will try slicing the bar after it has chilled overnight the picture below is after about 1 hour of chilling.
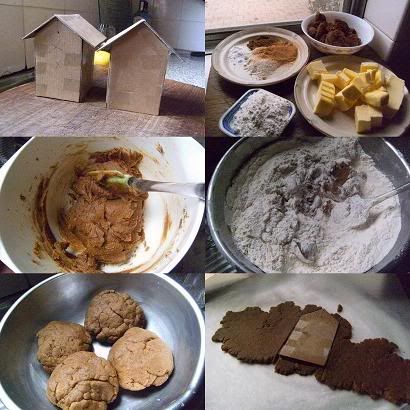
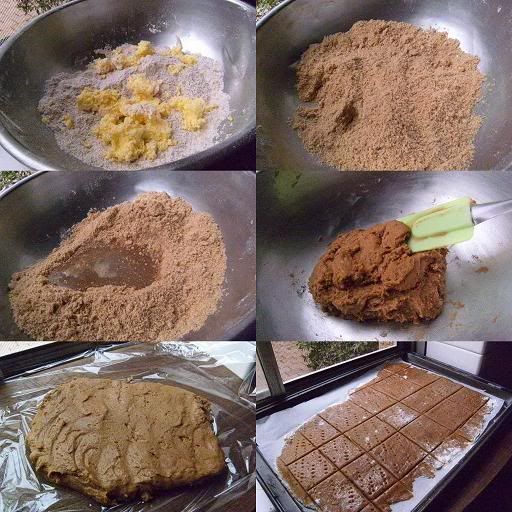
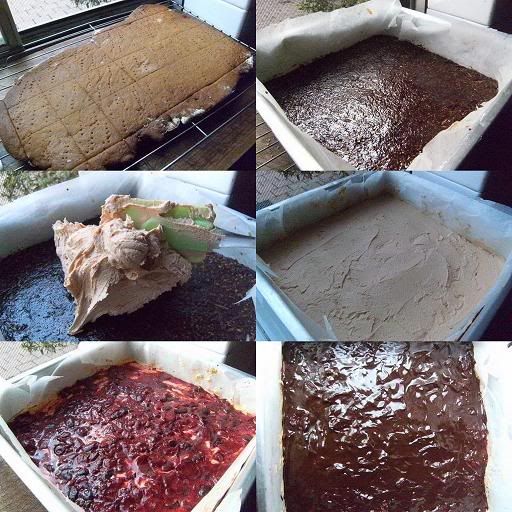
Pictures 01-06
Butter about to be rubbed into the flours; rubbed flours and butter which look like coarse sand, melted honey, milk and vanilla being added; soft sticky dough; dough disk about to be chilled; rolled-out and docked dough about to be baked
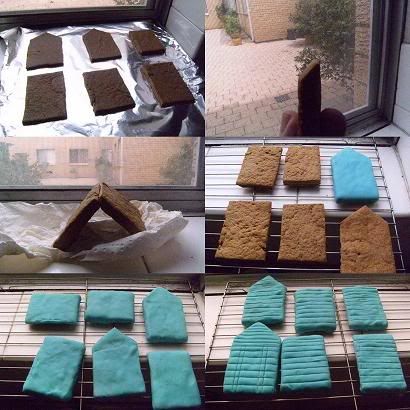
Picture 07-12
Baked dough;bottom layer;custard/butter/icing sugar middle layer; middle layer spread out; cherry layer; chocolate layer
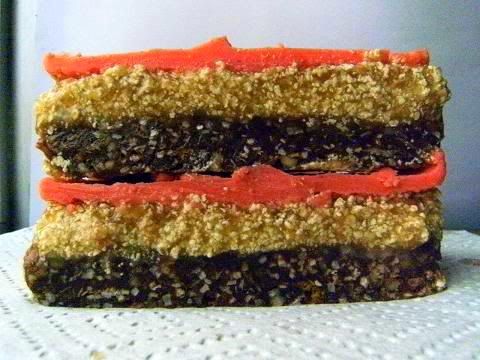
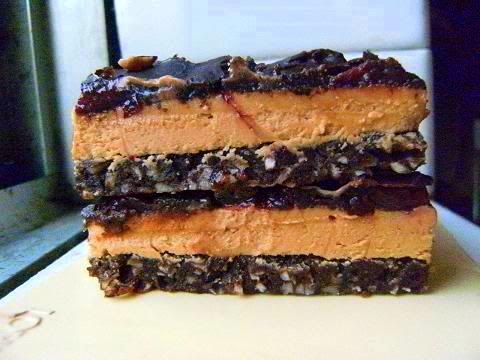
Double Layered Sour Cherry Nanaimo Bars
The full recipe will make about 16 serves, the slices are incredibly rich so you don't need much at all. Notice the light and fluffy layer of whipped butter/icing sugar/custard powder. I like double layers in my bars just takes a little longer to make and you need to chill the separate layers well so you can spread the next layer.
The one-hour chilled bar the orange colour is due to the soured cherry extract I added to the middle layers. (Red cherry extract plus yellow custard gives an orange coloured layer.)
It had melted a little (after 5 mins) in the heat we are having in Sydney at the moment. Still great.
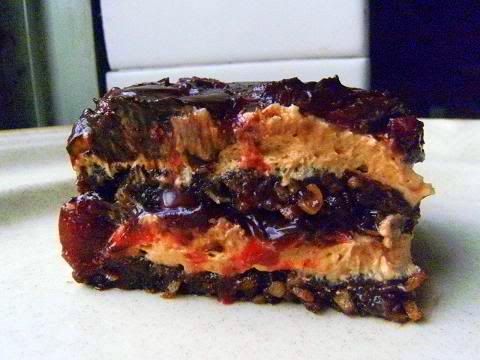
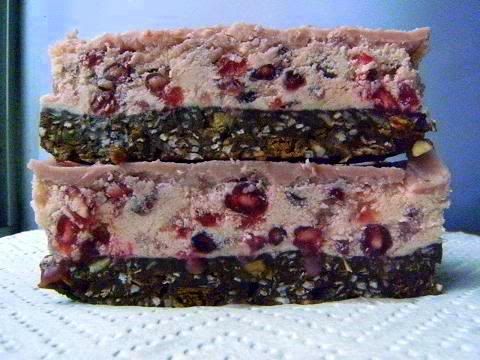
I chilled the bar overnight and as you can see it cuts cleanly when fully chilled compare with the slice that was chilled for only one hour shown above.
Batch #2
I made another batch wheat flour of Graham crackers just to have an afternoon snack with milk. They are so brown because I used dark brown sugar which is very dark in colour.
I used plain (all purpose) wheat flour I found my Graham crackers baked in no time at all! 12 minutes ! So beware of this if you are using APF.
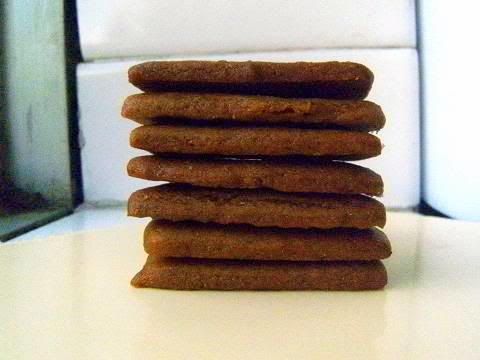
Lauren in fact the gluten-free wafers tasted better than the wheat flour ones above!
Batch #3
Epicurean Nanaimo Bars
I decided to do some gourmet flavours for these exquisitely rich Nanaimo bars. I racked my brains for a few hours and came up with four bars.
Some of the ingredients for the Epicurean Nanaimo Bars
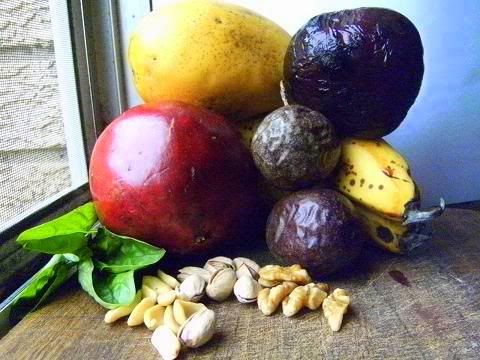
I recommend that you cut the bars into 1”x1” (25mm x 25mm) pieces.
I tried to come up with a simple notation to describe the flavour sensations that were perceived when eating the bars so for example in the Beetroot bar I could taste {Maple-Syrup-Roasted Beetroot/Dutch-cocoa/malt/cranberry} as one-whole flavour combination then {kecap manis/coconut} came out as one flavour sensation then {pistachio/coconut/black tea} as one flavour sensation then {cinnamon/coffee} and finally {cranberry/black chillies}. That is in the beetroot bar five flavour combinations were perceived in the order shown and of course some flavours could be repeated in different perception groupings so I could taste {kecap manis/coconut} and {pistachio/coconut/black tea} for example. I have done similar flavour perception groupings for each of the bars. I hope the notation is clear since it is so difficult to express flavours and neigh on impossible to describe how they group together.
A good question to ask is why I chose the ingredient combinations used in the bars below – it's because it has been shown that a certain flavour can be reproduced by taste components of other foods, for example the flavour of beetroot has the same (or a lot of the same) taste components as black tea, maple syrup, malt, dark chocolate, coffee, kecap manis, etc... So I chose the minor ingredients that had the same taste components as the major ingredient that way the flavours of the bar would intensify and enhance each other. Another example is balsamic vinegar and strawberry they actually have a lot of similar taste components in common this is way they go so well together. And one last example is sage and burnt butter which have a lot of the same taste components and again this is why they go so well together. Of course another point is since each layer of the bar has only certain component parts of the overall major ingredient's flavour this helps keep the separate taste sensations oscillating amongst each other so when you are tasting the bar the taste groupings have a kinetic or a dynamic nature which makes the overall flavour an ever-changing kaleidoscope of taste sensations and since the taste components are so well matched this makes for a harmonious flavour symphony for the palate, that is the bar is more like a degustation menu (many small servings of titbits that are composed around a common flavour theme) of the major ingredient's flavour sensations. More simply each bite seems to scintillate with the taste components of the major ingredient. This is what my very simple notation is trying to capture it's very inadequate I know but it is so hard to describe taste and flavour.
Banana, walnut, burnt butter, strawberry white chocolate, mint, cloves, sage and green tea
The flavour sensations for this bar are in this order {Banana/walnut/burnt butter/custard} then {strawberry white chocolate/mint} then {banana/sage/burnt butter} and {mint/cloves/green tea} – this was intensely banana flavoured and the {banana/sage/burnt butter} combination was the best flavour sensation the {mint/cloves/green tea} added a cleansing sensation to finish. The white chocolate added a lot extra mouth-feel to this light yet intensely flavoured dessert it tasted like a very rich ice-cream.
The bottom layer – replace the almonds with walnut also add 1 teaspoon mint powder, 1/8 teaspoon of clove powder, ¼ teaspoon of chopped sage and 2 dashes green tea powder replace the butter with burnt butter
The middle layer – add ¾ banana that has been blended into a smooth paste also add extra ½ tablespoon of cornflour replace the butter with burnt butter
The top layer – replace semi-sweet chocolate with strawberry flavoured white chocolate
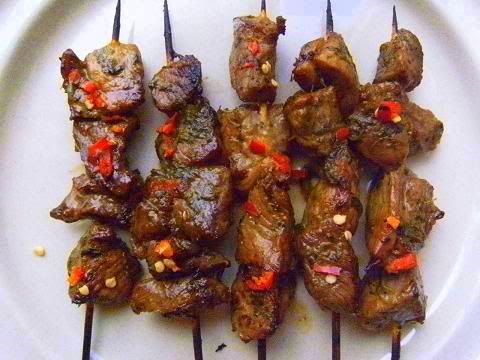
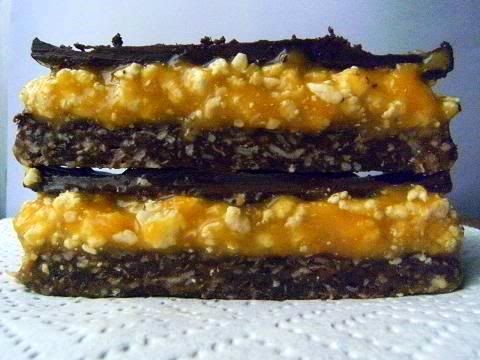
Mango & Passion fruit, vanilla bean, basil syrup, roasted peanuts, chilli, soy sauce
The flavour sensations for this bar are in this order {Mango/Passion fruit/vanilla bean/coconut/custard} then {passion fruit/vanilla bean/basil syrup} then {coconut/roasted peanuts/chilli/soy sauce} – this tasted like a summer day! The basil syrup really added a taste kick to the flavour profile of the bar. This would be great with duck or a very fatty beef main meal.
The bottom layer – replace almonds with roasted peanuts
The middle layer – add ½ mango and the strained pulp of 2 passion fruit which have been blended into a smooth paste also add 1 tablespoon of basil syrup also add 1 vanilla bean and finally add ½ teaspoon of soy sauce add extra 2 teaspoons of cornflour
The top layer – add ¼ teaspoon of chilli powder to the melted chocolate
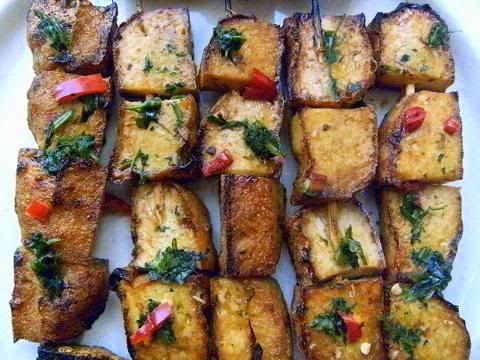
Pomegranate. cherry, rose, poppy seed, roasted pine nuts, cumin, fennel, chives and parsley
The flavour sensations for this bar are in this order {pomegranate/cherry/coconut/rose} then {poppy seed/roasted pine nuts/coconut/pomegranate} then {cumin/fennel} then {chives/parsley} – this was particularly tasty and the {chives/parsley} flavour after-note was absolutely delicious and surprisingly good.
The bottom layer – replace almonds with roasted pine nuts add ¼ teaspoon each of crushed poppy seeds, cumin powder, fennel powder, chive powder and parsley powder
The middle layer – add the seeds of ½ pomegranate and 2 teaspoons of pomegranate molasses and 3 drops of rose essence also use pure cornflour instead of the custard powder
The top layer – replace semi-sweet chocolate with cherry-flavoured dark chocolate
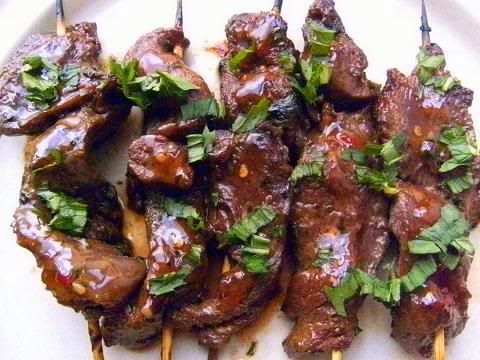
Maple Syrup Roasted Beetroot, Dutch-cocoa, malt, kecap manis, pistachio, cranberry, black tea, cinnamon, coffee and dried black chillies
The flavour sensations for this bar are in this order {Maple Syrup Roasted Beetroot/Dutch-cocoa/malt/cranberry} then {kecap manis/coconut/coffee} then {pistachio/coconut/black tea} then {cinnamon/coffee} and {cranberry/black chillies}. This was the best of the lot for me there is something about beetroot and chocolate that goes so well together and the flavour combination {kecap manis/coconut/coffee} was the perfect complementary combination to follow the first major flavour sensation of {Maple Syrup Roasted Beetroot/Dutch-cocoa/malt/cranberry} and the {cranberry/black chillies} was a nice touch of sour/hot at the end of the flavour sensations.
The bottom layer – replace almonds with pistachio and replace half of the coconut with grated roasted beetroot
The middle layer – add ¼ roasted grated beetroot add 1 teaspoon of black tea, 2 teaspoons malt powder, 2 teaspoons kecap manis sauce and 1 tablespoon of Dutch-cocoa also add 2 teaspoons of cornflour
The third layer – cranberry white chocolate (use unsweetened cranberry you need the sourness)
The top layer – replace semi-sweet chocolate with 70% dark chocolate add ¼ teaspoon of instant coffee and 2 dashes of powdered black chillies
I had a taste testing with some friends they thought I had made very expensive 'chocolate truffles' or exquisite "ice cream bars' and where delighted with the results, their overall favourite was the beetroot also, closely followed by the Mango & Passion fruit with basil syrup. They really liked how the flavour sensations oscillated the whole time they were tasting the bars.
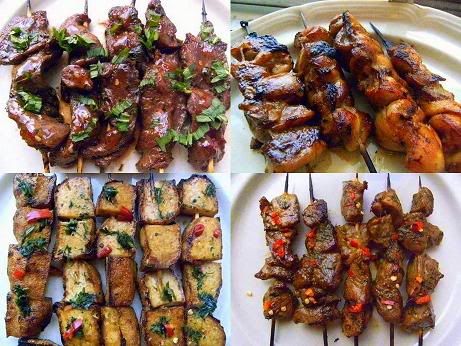
Collage of the Epicurean Nannimo Bars
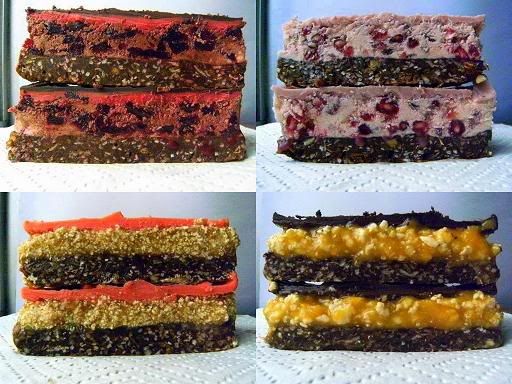
From top left hand corner going clockwise – beetroot , pomegranate, mango, banana.
Batch #4
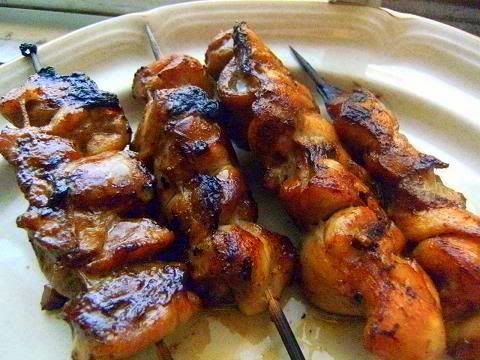
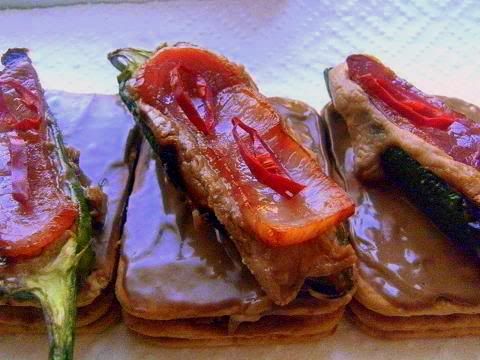
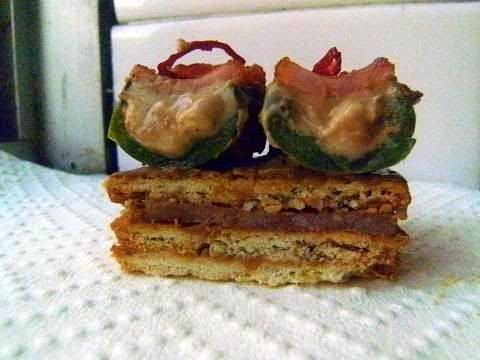
Bacon jalapenos with a Stack of Filled Graham wafers with bacon, vegemite, cocoa and kecap manis filling
I had to make at least one savoury version of this slice and the opportunity was this morning I had a Australia Day (a national public holiday here) BBQ to go to so I made a very quick heat-resistant savoury slice from Graham crackers, crispy bacon, and a filling of cream cheese/vegemite/kecap manis/cocoa powder and topped with Pioneer Women's Bacon wrapped jalapeños.
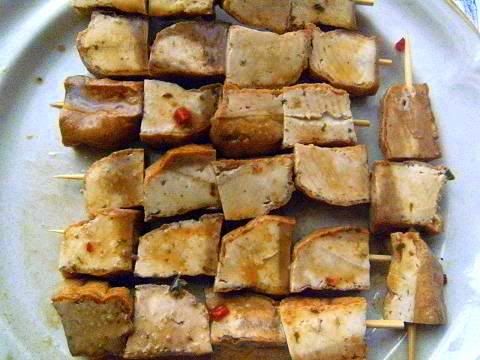
Bottom layer – spread the filling on a cracker then place another cracker on top spread more fillilng on it and add a crisp bacon slice on it add another cracker. This will set in the heat such that it can be cut cleanly. Do not spread on the sides this makes for clean fingers when eating them
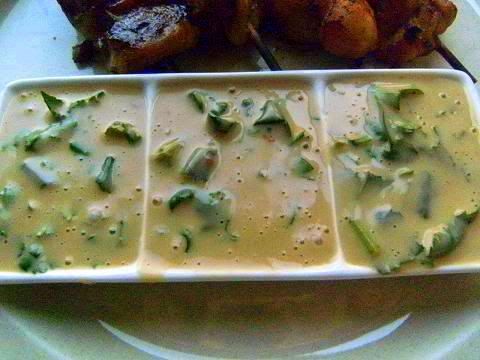
Filling – combine 4 parts cream cheese and 1 part each of vegemite, kecap manis, cocoa powder and cornflour this sets very firm and will not melt in the heat and sticks all the layers together.
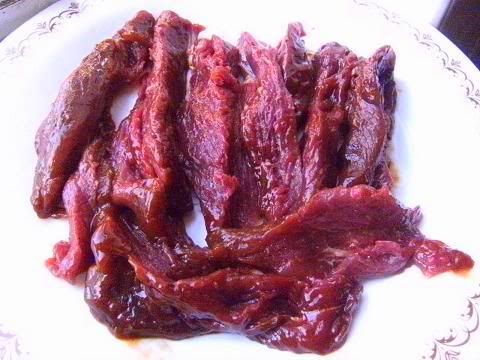
Topping – spread some of the filling on the top of the stack of crackers/bacon and place one bacon wrapped jalapeño use the stack filling as the filling for the jalapeño.
The filling is so so good it takes some courage to have vegemite, cocoa, kecap manis with cream cheese but they really do work well together.
The stack of crackers tastes so good; the sweetness of the manis; the saltiness of the vegemite and bacon; and the earthiness of the cocoa compliment each other perfectly.
Bacon jalapeños with a stack of bacon, vegemite, cocoa and kecap manis filled Graham wafers
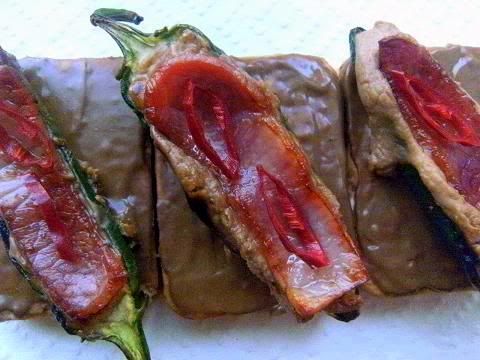
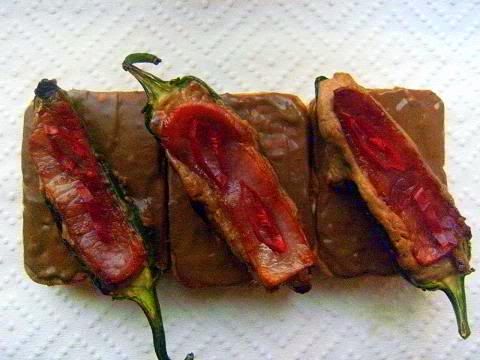
Notice the layers of crackers, bacon and filling which forms a very heat resistance and tasty stack that is then topped with a bacon jalapeño.
The stack and the jalapeño work so well together the jalapeño is very juicy hot sweet salty which plays with the stack flavours and textures nicely.
Notes for gluten-free Graham Wafers and Nanaimo Bars:
• Glutinous rice flour does not contain any gluten, as it is made from a type of rice called glutinous (or sweet) rice.
• The graham wafer dough is very sticky. Make sure you are flouring (with sweet rice flour) well, or the dough will be difficult to remove from the surface you roll it out on. Also be sure to keep it cold. You do not want the butter to melt.
• I chose these flours because of their availability. Tapioca starch/flour and sweet rice flour can often be found in Asian grocery stores, or in the Asian section of you grocery store. Sorghum can be slightly more difficult to find, but it can be replaced with brown rice flour, millet flour or other alternatives.
• In the Nanaimo Bars, it is very important that the chocolate be cool but still a liquid, otherwise the custard layer will melt, and it will mix with the chocolate, being difficult to spread. Allow the chocolate mixture to come to room temperature but not solidify before spreading the top layer on.
Variations allowed:
• Although I highly recommend using gluten-free flours, as the chemistry is very interesting and the end result can be amazing, you are allowed to use wheat.
• If making them gluten-free, no wheat, barley, rye, triticale, kamut, spelt, durum, semolina, or other gluten containing ingredients may be used. Removing those ingredients ensures it is safe for those with Celiac Disease and other health issues where gluten causes problems. If you do plan on serving this to someone on a gluten-free diet, also ensure no cross-contamination occurs.
Preparation time:
• Graham Wafers: 30 to 45 minutes total active prep, 2 ½ hours to overnight and 45 minutes inactive prep.
• Nanaimo Bars: 30 minutes.
Equipment required:
• Food Processor
• Bowls
• Parchment paper or silpats
• Cookie sheets
• Double boiler or pot and heatproof bowl
• 8 by 8 inch square pan
• Hand mixer or stand mixer (You may use a wooden spoon, but this makes it much easier!)
• Saucepan
For Gluten-Free Graham Wafers
Ingredients
1 cup (138 g) (4.9 ounces) Sweet rice flour (also known as glutinous rice flour)
3/4 cup (100 g) (3.5 ounces) Tapioca Starch/Flour
1/2 cup (65 g) (2.3 ounces) Sorghum Flour
1 cup (200 g) (7.1 ounces) Dark Brown Sugar, Lightly packed
1 teaspoon (5 mL) Baking soda
3/4 teaspoon (4 mL ) Kosher Salt
7 tablespoons (100 g) (3 ½ ounces) Unsalted Butter (Cut into 1-inch cubes and frozen)
1/3 cup (80 mL) Honey, Mild-flavoured such as clover.
5 tablespoons (75 mL) Whole Milk
2 tablespoons (30 mL) Pure Vanilla Extract
Directions:
1. In the bowl of a food processor fitted with a steel blade, combine the flours, brown sugar, baking soda, and salt. Pulse on low to incorporate. Add the butter and pulse on and off, until the mixture is the consistency of a coarse meal. If making by hand, combine aforementioned dry ingredients with a whisk, then cut in butter until you have a coarse meal. No chunks of butter should be visible.
2. In a small bowl or liquid measuring cup, whisk together the honey, milk and vanilla. Add to the flour mixture until the dough barely comes together. It will be very soft and sticky.
3. Turn the dough onto a surface well-floured with sweet rice flour and pat the dough into a rectangle about 1 inch thick. Wrap in plastic and chill until firm, about 2 hours, or overnight.
4. Divide the dough in half and return one half to the refrigerator. Sift an even layer of sweet rice flour onto the work surface and roll the dough into a long rectangle, about 1/8 inch thick. The dough will be quite sticky, so flour as necessary. Cut into 4 by 4 inch squares. Gather the scraps together and set aside. Place wafers on one or two parchment-lined baking sheets. Chill until firm, about 30 to 45 minutes. Repeat with the second batch of dough.
5. Adjust the rack to the upper and lower positions and preheat oven to 350 degrees Fahrenheit (180 degrees Celsius).
6. Gather the scraps together into a ball, chill until firm, and reroll. Dust the surface with more sweet rice flour and roll out the dough to get a couple more wafers.
7. Prick the wafers with toothpick or fork, not all the way through, in two or more rows.
8. Bake for 25 minutes, until browned and slightly firm to the touch, rotating sheets halfway through to ensure even baking. Might take less, and the starting location of each sheet may determine its required time. The ones that started on the bottom browned faster.
9. When cooled completely, place enough wafers in food processor to make 1 ¼ cups (300 mL) of crumbs. Another way to do this is to place in a large ziplock bag, force all air out and smash with a rolling pin until wafers are crumbs.
Nanaimo Bars
Ingredients:
For Nanaimo Bars — Bottom Layer
1/2 cup (115 g) (4 ounces) Unsalted Butter
1/4 cup (50 g) (1.8 ounces) Granulated Sugar
5 tablespoons (75 mL) Unsweetened Cocoa
1 Large Egg, Beaten
1 1/4 cups (300 mL) (160 g) (5.6 ounces) Gluten Free Graham Wafer Crumbs (See previous recipe)
1/2 cup (55 g) (1.9 ounces) Almonds (Any type, Finely chopped)
1 cup (130 g) (4.5 ounces) Coconut (Shredded, sweetened or unsweetened)
For Nanaimo Bars — Middle Layer
1/2 cup (115 g) (4 ounces) Unsalted Butter
2 tablespoons and 2 teaspoons (40 mL) Heavy Cream
2 tablespoons (30 mL) Vanilla Custard Powder (Such as Bird’s. Vanilla pudding mix may be substituted.)
2 cups (254 g) (8.9 ounces) Icing Sugar
For Nanaimo Bars — Top Layer
4 ounces (115 g) Semi-sweet chocolate
2 tablespoons (28 g) (1 ounce) Unsalted Butter
Directions:
1. For bottom Layer: Melt unsalted butter, sugar and cocoa in top of a double boiler. Add egg and stir to cook and thicken. Remove from heat. Stir in crumbs, nuts and coconut. Press firmly into an ungreased 8 by 8 inch pan.
2. For Middle Layer: Cream butter, cream, custard powder, and icing sugar together well. Beat until light in colour. Spread over bottom layer.
3. For Top Layer: Melt chocolate and unsalted butter over low heat. Cool. Once cool, pour over middle layer and chill.
Collage of the Epicurean Nannimo Bars
From top left hand corner going clockwise – beetroot , pomegranate, mango, banana