

The challenge recipes were mallows (chocolate coated marshmallows on a cookie base) and milanos.
The mallows were easy to make the cookie base recipe (see below) should be halved since it makes about 100+ mallows. The marshmallow is easy to make and can be flavoured or coloured when you are mixing and cooling the marshmallow. You can pipe or mould (see below for the process) the mallows. Melting the chocolate seemed to cause blooming problems for some Daring Bakers' I have included full notes on how to melt and temper chocolate.
The milanos were more interesting I have ever heard of these before, they are a very popular cookie in the United States they have rectangular shape with circular ends, they are thin very crisp and have a citrus flavour. The recipe uses 4 tablespoons of flavour extract which is correct. They should be piped using a stencil and then refrigerated for 20 mins and then baked.
First Batch of each
Overall an easy peasy challenge and a very yummy one. I did the first batch of each in a professional kitchen at a big city hotel which makes it much easier to get a top-notch result. I did two types of marshmallows - which baked up very rich and very strong tasting and I could only eat one of each kind with comfort.
1.the given recipe and
2.I placed some cocoa powder in the cookie base and then a hazelnut marshmallow centre surrounded with liquor flavoured marshmallow then coated in nut pieces ( I had a lot of nuts left over from last month's Bakewell challenge) and then coated in cherry flavoured chocolate with dark chocolate lines.
3.When making the syrup here is a link about softball stage
4. Here is another link with lots of pixs but it goes to hard-ball stage not soft ball stage
Notes
a. cocoa butter I could get this at a large hotel's kitchen in the city a friend who works there owned me big time and I could get some and it gives a much better taste and mouth-feel to the marshmallow drops
b. powdered sugar=icing sugar
The Milan Cookies where especially good I did a lighter filling half white/dark chocolate and coated half the cookie in chocolate.


Light Corn Syrup Substitute or Glucose Syrup
This recipe is a wonderful substitute for Karo Syrup.
Ingredients
* 2 cups granulated sugar
* 3/4 cup Water
* 1/4 tsp. Cream of Tartar
* dash of salt
Directions
Combine all ingredients in a heavy, large pan (stainless). Stir and bring to a boil. Reduce heat to a simmer and put cover on it for 3 minutes to get sugar crystals off the sides of the pan. Uncover and cook until it reaches soft ball stage, 238 -240 degrees F.
Cool syrup and store in a covered container at room temperature. It will keep for about 2 months.
Makes almost 2 cups.
The cream of tartar will change some of the sugar into glucose, which prevents crystallization of the sugar as it cools. This is why corn syrup and the like is used. Cream of tartar obtains the same results without the addition of more sugars. The chemical name for cream of tartar is potassium hydrogen tartrate, (if you can't find it in the grocery store in the bakery section usually near the baking soda/baking powder sections, try looking in the pharmacist's or the apothecary.) and is usually obtained as a by-product of wine production
Glucose syrup is very similar to light corn syrup (corn syrup has more fructose than pure glucose and tastes sweeter) I asked a few people in the industry it will work but it will be less sweet I don't think that really is a problem with this recipe. (I used half glucose and half corn syrup because the pastry chef told me that it works better.)
Making the Marshmallows
You don't need to get a candy thermometer it is easy to eye-ball the correct temperature when the sugar solution is at soft-ball stage, if the bubbles hold their shape for a few seconds or when you place a drop of the sugar solution in cold water it forms a soft-ball as shown in the following photographs it is ready. Warm the syrup jar in hot water and it will be much easier to get into the measuring cup. Be warned that you will have a washing up task after making the marshmallow, use very hot water to get rid of the remains in your pots and pans and use heat-resistant bowls and spatuals. If you don't the bowl might crack or the spatula might melt since the syrup is very very hot. If you want to colour or flavour the marshmallow add these when you have almost whipped the marshmallow to completion.
The ingredients – sugar, gelatin, glucose syrup, gelatin soaked with water in small white plastic cup, flavoured jelly (jell-o) if using to get colour and flavour in the marshmallow. (Soft-peak eggs whites not shown)

In a saucepan, combine the water, corn or glucose syrup, and sugar, bring to a boil until “soft-ball” stage (the next four photos show this process)
Just mixed and heating up to the soft-ball stage

First bubbles

After 4 mins or so, take the pan off the heat if the bubbles hold their shape for a few seconds in the boiling sugar solution it is about ready if not continue boiling the mixture, I took this photo near my window (not on my stove top) and notice how the bubbles held their shape.

The soft-ball test - place a small drop of the boiling sugar syrup in cold water and if it forms a soft-ball it is ready.

Adding the syrup to the eggwhites remember to use a heat-resistant bowl

Whipped marshmallow

After cooling if it holds a swirl it is the correct consistency

Second batch
Some mallow tears for a fancy tea I was serving - I did a range coated in white chocolate and strawberry chocolate then coated in various toppings. And some covered in another range of toppings then coated in chocolate. The white chocolate one's look very cute on the plate while the chocolate coated one's hold all sorts of yummy things and tastes. These where so nice to eat very strong and very adult. As you can notice I did a coating of the milano filling on the cookie base and then added a dash of jam then the marshmallow and then a topping on the marshmallow.
Starting from the yellow crystal mallow going clock wise
Lemon sugar, coconut, pistachio nuts and 100's and 1000's (multi-coloured sprinkles)

Pistachio topping

100's and 1000's coated with strawberry chocolate

Lime and lemon marshmallow

Very shiny chocolate coating

The cut versions - the marshmallow centres are flavoured thus pink is strawberry, green is pistachio, white is coconut and yellow is lemon liquor.

Close-up of the 100's and 1000's with strawberry jam

Third batch
I did 'snow cones' for a BBQ on the weekend these are cones of marshmallow covered in chocolate dip and coated in coconut they don't have a cookie base.


Fourth batch
I made another batch of Milano's with a friend's small child (8 year old) at a late lunch BBQ it was so much fun for her and her Mum and the other people. We made wild cherry milanos with cherry filling. We used wild cherry extract that is bright red (so the colour of the finished cookies) and rose water extract. We used small pans to make the milanos the same size since she couldn't pipe the mixture. The smell of these baking is amazing!!! She was very impatient to fill the cookies so the filling was a little runny I told here she did a wonderful effort and they were very very crisp so maybe that is something to do with the small pans.


Also she doesn't like the shape of mallows and point blank refused to make them so I made (with some help from Emily, spreading the cream, the filling and the rolling which she loved doing) a wild cherry marshmallow swirl roll with cream and wild cherry jam. The pink marshmallow is cherry flavour the white is vanilla. I just concocted this at the last moment no recipe it sort of looks like sponge but is marshmallow amazing to eat since it fools the eye. She was amazed how well she did on her first baking challenges with only some small help from me. Well done Emily. She is so excited seeing this on the internet she is very proud.

How to shape your mallows
Here is one method that is cheap, easy and really does work as can be seen and makes the whole process a dream to make. And all your mallows will look exactly the same and be perfectly smooth.
How to make perfect chocolate mallow shapes using a flour mould an old fashioned method but it does work.
In a tray loosely place flour or icing sugar or cornstarch try to make the top level and deep enough for your stamp.

Then stamp your shape into the flour. You can use very elaborate designs think letters A,B,C,.... animals moulds, seashells, chocolate moulds etc.

Pour the marshmallow into the mould

Wait for 2 hours and you will have a smooth mallow you can brush off the flour/starch/icing sugar on the mallow

You can attach the mallow to the cookie base using a smear of jam (not too much) or use a very hot spoon and lightly heat the base of the prepared mallow and place on the cookie base.
Completed chocolate coated mallow

Exactly the same shape as last time I did it a week ago.

You can reuse the flour/cornstarch/icing sugar again and again just sift and restore in your container.
Melting Chocolate and Chocolate Problems
Sorry to hear and see the blooming you got - I think chocolate is one of the hardest baking skill set's there is.
The First thing to discuss
Blooming Problems - What blooming?
Sugar bloom is normally caused by surface moisture. The moisture causes the sugar in the chocolate to dissolve. Once the moisture evaporates, sugar crystals remain on the surface. If this process is repeated, the surface can become sticky and even more discolored. Although sugar bloom is most often the result of overly humid storage, it can happen when the chocolate has been stored at a relatively cool temperature and is then moved too quickly into much warmer surroundings. When this happens, the chocolate sweats, producing surface moisture.
Fat bloom is similar to sugar bloom, except that it is fat or cocoa butter that is separating from the chocolate and depositing itself on the outside of the candy. As with sugar bloom, the most common causes of fat bloom are quick temperature changes and overly-warm storage.
First question did you notice if the bloom felt grainy (like sugar) when you bit into it. If it was then most likely it was sugar bloom.
2nd question did you place the coated mallows in the fridge to cool overnight? Don't put your tempered chocolate items in the refrigerator to help them set faster; they won't set up correctly. Room temperature is the way to go. If you did then most likely it was fat bloom that caused the problem.
The Second thing to discuss
You used the seed method and it sounds like you did it correctly more or less.
The seed method (as described in The Professional Chef). Since almost all the chocolate that is sold is already tempered, we can use a piece of this already tempered chocolate as a plentiful source of stable seed crystals.
1. Melt the chocolate in a double boiler while stirring to ensure unform temperature.
2. Once the chocolate has fully melted and reached a temperature of over 105°F (41°C), remove it from the heat. At this temperature, all the crystals, loose or stable, should be melted. Add a piece of unmelted chocolate to provide the seed crystals. This piece can be as big as 2 ounces (if you're melting a sizeable amount of chocolate) or can be chopped up into a few smaller pieces.
3. Stir until the chocolate's temperature enters the tempering range, 88-90°F (31-32°C). The chocolate should be kept at this temperature and stirred until used.
3rd question did you heat the chocolate and butter at the same time and stir all the time? If not you can get fat blooming because the clarified butter did not coat each crystal evenly.
4th question - did you stir the tempered chocolate while you where coating the cookies - stirring helps keeps the stable crystals stable and inhibits the formation of the unstable crystals.
5th question - did you keep the melted chocolate in it's tempering range throughout the coating process? If not you could of caused unstable crystals to form therefore losing temper. And untempered chocolate easily forms fat bloom.
The third thing to discuss
Now to the full details about melting chocolate - this is long but does have a point (info from Wikipeadia)
The fats in cocoa butter can crystallize in six different forms (polymorphous crystallization). The primary purpose of tempering is to assure that only the best form is present. The six different crystal forms have different properties.
Crystal Melting Temperature Notes
I 17⁰C (63⁰F) Soft, crumbly, melts too easily.
II 21⁰C (70⁰F) Soft, crumbly, melts too easily.
III 26⁰C (78⁰F) Firm, poor snap, melts too easily.
IV 28⁰C (82⁰F) Firm, good snap, melts too easily.
V 34⁰C (94⁰F) Glossy, firm, best snap, melts near body temp (37⁰C).
VI 36⁰C (97⁰F) Hard, takes weeks to form.
Making good chocolate is about forming the most of the type V crystals. This provides the best appearance and mouth feel and creates the most stable crystals so the texture and appearance will not degrade over time. To accomplish this, the temperature is carefully manipulated during the crystallization.
Generally, the chocolate is first heated to 45⁰C (113⁰F) to melt all six forms of crystals. Then the chocolate is cooled to about 27⁰C (80⁰F), which will allow crystal types IV and V to form (VI takes too long to form). At this temperature, the chocolate is agitated to create many small crystal "seeds" which will serve as nuclei to create small crystals in the chocolate. The chocolate is then heated to about 31⁰C (88⁰F) to eliminate any type IV crystals, leaving just the type V. After this point, any excessive heating of the chocolate will destroy the temper and this process will have to be repeated. However, there are other methods of chocolate tempering used-- the most common variant is introducing already tempered, solid "seed" chocolate.
6th question did you overheat the chocolate once it was tempered to over 34⁰C (94⁰F)? Which causes melting of the type V crystals which can lead to the formation of the other unstable crystals types to form therefore losing the temper of the chocolate and if you use untempered chocolate to glaze you will have a grayish, powdery surface on the chocolate. Untempered chocolate develops serious bloom in 24-48 hours, and it never gets the beautiful shine of tempered chocolate.
7th question if it was losing temper that caused the blooming which type of unstable crystal form did you get? You said that it did set to a hard crust so most likely you got type III or IV. Looking at the above list if the coating had a soft snap it was type III and if it had a hard snap it was IV.
The Last thing to discuss
Last important point - tempered chocolate cannot be used for retempering if ingredients have been added to it, such as oil or cream or has been used to dip fruits. That is once you lost temper on the clarified-butter-tempered-chocolate you created you cannot recovery the temper you can only use this chocolate for ganache or in baking recipes.
Specific Tempering Temperatures
Depending on the cocoa butter content of the chocolate and introduction of other ingredients, the tempering temperature of chocolate varies. Harold McGee's On Food and Cooking provides these values for the three broad categories of chocolate:
Type of Chocolate
Tempering Temperature
Dark (no milk content) 88-90°F (31-32°C)
Milk 86-88°F (30-31°C)
White 80-82°F (27-28°C)
Sorry for this very long and complex posting. Yikes who would of thought melting chocolate and keeping its temper was so technical. All I normally do (my mum taught me this) is get some chopped chocolate place in a very heavy ceramic bowl (which keeps a stable temperature for a long time) over some med-hot water wait until it starts to melt a bit then stir constantly and always have a few small bits of unmelted chocolate in it (add more if needed) and then coat I never realised I was doing all the above until I asked a few of my chef friends. Of course what I'm really doing is the seed method since I have a source of stable crystals from the unmelted chocolate that is stabilizing the melted chocolate and keeping its temper. Girl I don't think I want to know anymore about melting chocolate I think my brain is full!!!
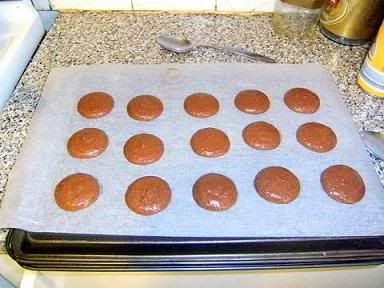
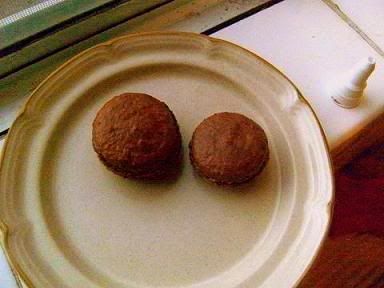
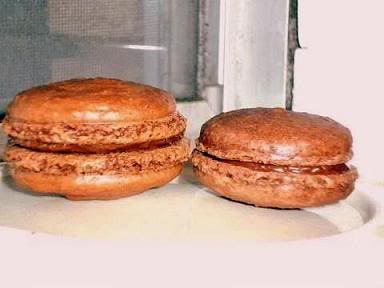
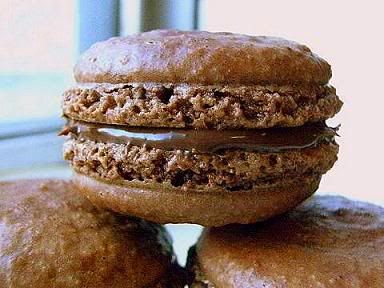
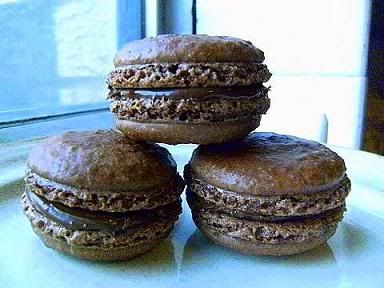
I made some French Macarons (see here for full instructions)

Challenge Recipes
I'm a huge fan of Gale Gand, I have tried a lot of her recipes and they are such a huge success. For July's challenge though I wanted to try something different and I wanted to do Gand’s version on my favorite store bought cookies which are the Peppridge Farm Milano Cookies and the Mallows (Chocolate covered Cookies). I've been wanting to try this recipes but just haven't have the chance to do so or to be honest haven’t have the courage to tackle homemade marshmallow yet, until now.
Mallows(Chocolate Covered Marshmallow Cookies)
Recipe courtesy Gale Gand, from Food Network website
Chocolate Covered Marshmallow Cookies
Prep Time: 10 min
Inactive Prep Time: 5 min
Cook Time: 10 min
Serves: about 2 dozen cookies (Most people found this made over 120 cookies) so do a half batch.
• 3 cups (375grams/13.23oz) all purpose flour
• 1/2 cup (112.5grams/3.97oz) white sugar
• 1/2 teaspoon salt
• 3/4 teaspoon baking powder
• 3/8 teaspoon baking soda
• 1/2 teaspoon ground cinnamon
• 12 tablespoons (170grams/ 6 oz) unsalted butter
• 3 eggs, whisked together
• Homemade marshmallows, recipe follows
• Chocolate glaze, recipe follows
1. In a mixer with the paddle attachment, blend the dry ingredients.
2. On low speed, add the butter and mix until sandy.
3. Add the eggs and mix until combine.
4. Form the dough into a disk, wrap with clingfilm or parchment and refrigerate at least 1 hour and up to 3 days.
5. When ready to bake, grease a cookie sheet or line it with parchment paper or a silicon mat.
6. Preheat the oven to 375 degrees F.
7. Roll out the dough to 1/8-inch thickness, on a lightly floured surface. Use a 1 to 1 1/2 inches cookie cutter to cut out small rounds of dough.
8. Transfer to the prepared pan and bake for 10 minutes or until light golden brown. Let cool to room temperature.
9. Pipe a “kiss” of marshmallow onto each cookie. Let set at room temperature for 2 hours.
10. Line a cookie sheet with parchment or silicon mat.
11. One at a time, gently drop the marshmallow-topped cookies into the hot chocolate glaze.
12. Lift out with a fork and let excess chocolate drip back into the bowl.
13. Place on the prepared pan and let set at room temperature until the coating is firm, about 1 to 2 hours.
Note: if you don’t want to make your own marshmallows, you can cut a large marshmallow in half and place on the cookie base. Heat in a preheated 350-degree oven to slump the marshmallow slightly, it will expand and brown a little. Let cool, then proceed with the chocolate dipping.
Homemade marshmallows:
• 1/4 cup water
• 1/4 cup light corn syrup
• 3/4 cup (168.76 grams/5.95oz) sugar
• 1 tablespoon powdered gelatin
• 2 tablespoons cold water
• 2 egg whites , room temperature
• 1/4 teaspoon pure vanilla extract
1. In a saucepan, combine the water, corn syrup, and sugar, bring to a boil until “soft-ball” stage, or 235 degrees on a candy thermometer.
2. Sprinkle the gelatin over the cold water and let dissolve.
3. Remove the syrup from the heat, add the gelatin, and mix.
4. Whip the whites until soft peaks form and pour the syrup into the whites.
5. Add the vanilla and continue whipping until stiff.
6. Transfer to a pastry bag.
Chocolate glaze:
• 12 ounces semisweet chocolate
• 2 ounces cocoa butter or vegetable oil
1. Melt the 2 ingredients together in the top of a double boiler or a bowl set over barely simmering water.
Milan Cookies
Recipe courtesy Gale Gand, from Food Network website
Milan Cookies
Prep Time: 20 min
Inactive Prep Time: 0 min
Cook Time: 1 hr 0 min
Serves: about 3 dozen cookies
• 12 tablespoons (170grams/ 6 oz) unsalted butter, softened
• 2 1/2 cups (312.5 grams/ 11.02 oz) powdered sugar
• 7/8 cup egg whites (from about 6 eggs)
• 2 tablespoons vanilla extract
• 2 tablespoons lemon extract
• 1 1/2 cups (187.5grams/ 6.61 oz) all purpose flour
• Cookie filling, recipe follows
Cookie filling:
• 1/2 cup heavy cream
• 8 ounces semisweet chocolate, chopped
• 1 orange, zested
1. In a mixer with paddle attachment cream the butter and the sugar.
2. Add the egg whites gradually and then mix in the vanilla and lemon extracts.
3. Add the flour and mix until just well mixed.
4. With a small (1/4-inch) plain tip, pipe 1-inch sections of batter onto a parchment-lined sheet pan, spacing them 2 inches apart as they spread.
5. Bake in a preheated 350 degree oven for 10 minutes or until light golden brown around the edges. Let cool on the pan.
6. While waiting for the cookies to cool, in a small saucepan over medium flame, scald cream.
7. Pour hot cream over chocolate in a bowl, whisk to melt chocolate, add zest and blend well.
8. Set aside to cool (the mixture will thicken as it cools).
9. Spread a thin amount of the filling onto the flat side of a cookie while the filling is still soft and press the flat side of a second cookie on top.
10. Repeat with the remainder of the cookies.
