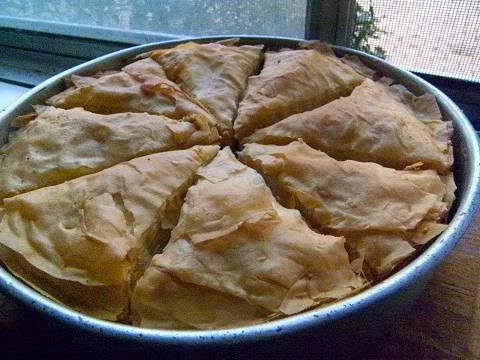
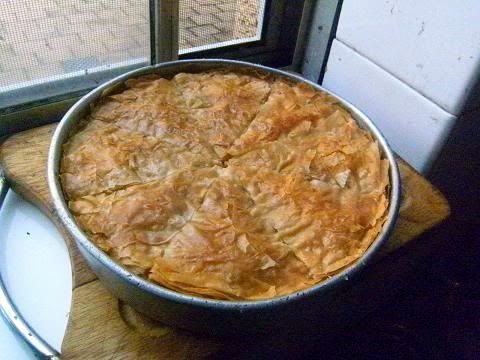
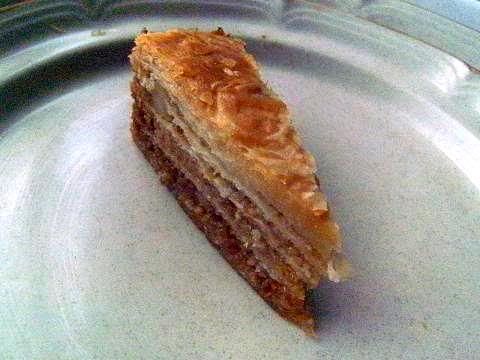
This month's challenge is baklava with home made phyllo pastry (yeah!!!). A wonderful challenge and so much fun. My neighbours who had over 120 years of experience give me an enormous amount of help thank you so much.The baklava's I made are about 1 inch (2.5 cm) high since several people have asked me how tall they are.
A marvellous challenge thank you Erica for the recipes and the opportunity to make phyllo pastry.
Blog-checking lines: Erica of Erica’s Edibles was our host for the Daring Baker’s June challenge. Erica challenged us to be truly DARING by making homemade phyllo dough and then to use that homemade dough to make Baklava.
See here for a PDF for the challenge recipe.
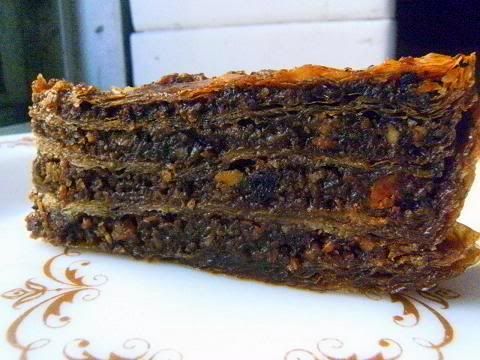
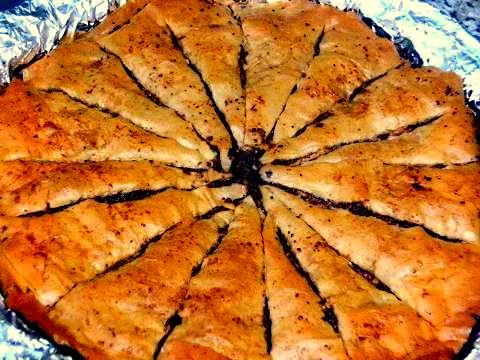
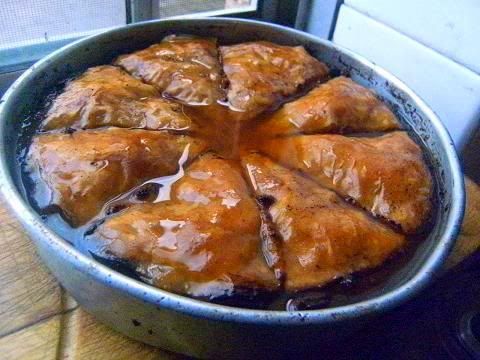
Spicy coconut chocolate cherry pistachio baklava
Wow what a fabulous challenge I have always wanted to make baklava because it is so delicious and more-ish. My neighbours love the start of the month since they know they will be having some of my challenge results and when I mentioned that it was baklava there was extra excitement since most of my neighbours are Greek and Turkish and they have a lot of experience with this dish. It was “decided” that I would attend a tutorial held by two of the ladies (one Greek lady 84 y.o. and one Turkish lady 80 y.o.) who have 120 years of experience in total with this recipe. This tutorial was to “pay-me-back” for all the dishes that I have provided them over the last couple of years. Well I had absolutely no choice about the situation and I didn't mind at all, and I have to admit it was wonderful fun to learn about this ancient dessert. The ladies and I had such a great time together they really enjoyed teaching me all the “tricks of the trade”.
The two ladies came to my kitchen and we started they were amazed that the Daring Bakers' recipe was (almost) the same as their recipe which was a good sign. I made up the dough the ladies advised me to use “OO” flour (i.e. pizza flour – a finely milled flour) since the resulting dough will be easier to stretch than if I had used normal all-purpose (plain) flour the dough was rested for two hours. Coincidentally the phyllo recipe is exactly the same as the strudel challenge that the Daring Bakers' did a while ago. After two hours I stretched out the dough to paper-thinness as I had done for the strudel challenge. The ladies said it was best to flour a clean sheet and stretch the dough on the sheet, this is the procedure I used for the strudel challenge and it works really well, also having the pastry on the sheet helps when you need to move the pastry from the table to the baking dish.
Then we made up the clarified butter and olive oil mixture for the phyllo pastry. The ladies insisted that clarified butter was better to use than normal butter since removing the milk solids gives a very crisp crust to the baklava. Also butter and olive oil (mostly butter and a couple of tablespoons of oil) was better than all butter since the pastry can get to a higher temperature which is important when we add the syrup.
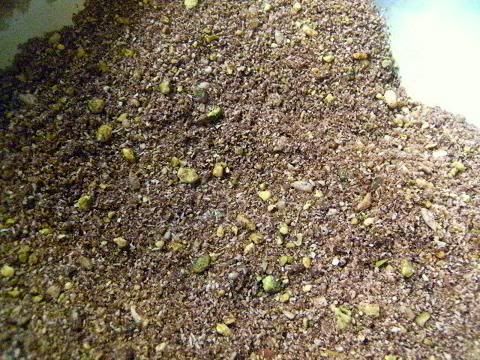
And now to the filling I used a mixture of desiccated coconut, pistachios, hazelnuts, pumpkin seeds, brown sugar, cherry extract and cocoa powder with a heaped tablespoon of ras el hanout I LOVED the taste of the filling it was superb so intriguing and taste bud stimulating. The ladies were a little amused with the filling flavour profile but they said they liked it especially the coconut/cocoa/cherry and the spicy over note. Coconut, pistachios, cherry and cocoa with a hint of spice really go well together I feel.
Using scissors the phyllo was cut to suit the 9" (23 cm) circular pan that was used. Every second layer of phyllo was buttered. The construction of the finished baklava was:-
8 layers of phyllo then 1/4 of the spicy filling, then
6 layers of phyllo then 1/4 filling, then
6 layers of phyllo then 1/4 filling, then
6 layers of phyllo then 1/4 filling, and then to finish
6 layers of phyllo. The ladies said it was best to use a very light hand and just sweep the butter/oil mixture over the phyllo pastry.
The ladies suggested a baking procedure that was a little different to the challenge method – bake for 30 minutes at 390°F (200°C/gas mark 6), then for 30 minutes at 300°F (150°C/gas mark 2), then for 30 minutes at 210°F (100°C/gas mark ¼). Finally, turn the heat back up to 390°F (200°C/gas mark 6) at the end to give the top a good dark golden colour. It really worked a wonder the baklava had an amazing colour and the phyllo was extra crispy.
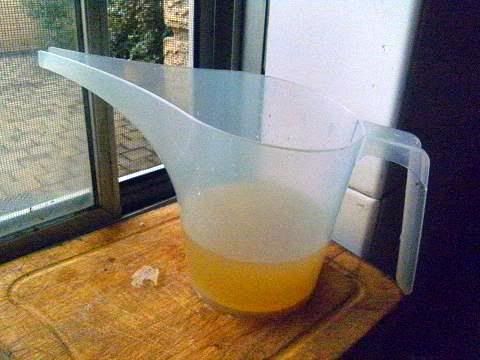
Then I made the syrup I'm not a big honey fan so I used golden syrup and brown sugar with lime juice (to make the syrup less sweet) and ras el hanout I ADORED this also it was so so tasty I could have this on toasted bread and be a very happy camper. Since I was using dessicated coconut I used almost twice as much syrup as stated since the coconut absorbs the extra liquid. If you use golden syrup and brown sugar the syrup will be dark and if the baklava is stored the pastry will go dark.
What was very interesting and not mentioned in the write-up of the recipe was the amazing sound that was produced when the cold syrup was poured onto the hot pastry it really sizzled and the pastry absorbed the syrup very quickly.
WOW the baklava is so moist and juicy and not that sweet which is what I wanted, it is so intriguing that the main taste was pistachio with chocolate then coconut then cherry and then a spicy lime finish yum yum.
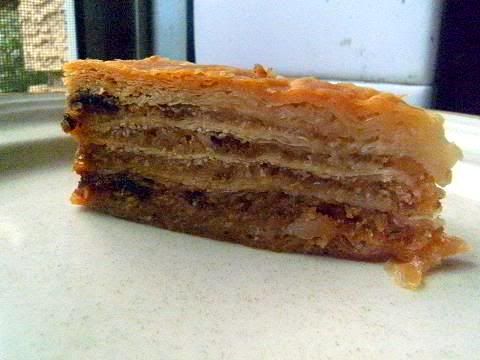
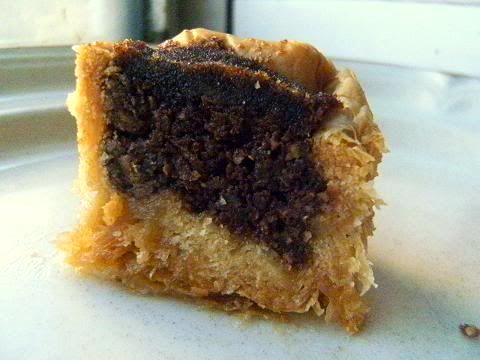
After an overnight rest I tried a thin slice of the baklava the flavours had melded together beautifully and the texture was stunning and the cut slice looked like a layered chocolate cake! I love how the coconut holds the syrup and the baklava wasn't too sweet at all, using brown sugar, golden syrup and lime juice really helped keep the sweetness in check. When the slice was bitten into it oozed a lovely thick juice that really made the baklava a joy to eat. I sometime find baklava too sweet, too dry and has a too strong honey over tone but this was so moist, juicy and had a lovely flavour profile that was so unlike normal baklava.
If you want a light well-risen baklava with crisp separate phyllo layers, lightly butter each second or third sheet of phyllo and don't make too many cuts into the baklava and don't use too much syrup and serve after 3 or 4 hours.
If you want a dense moist baklava that cuts cleanly, heavily butter each phyllo sheet make a lot of cuts into the baklava and use the maximum amount of syrup and store before serving.
The ladies give me a 8/10 for the baklava I made and I was very very happy with that they said I lost points for the non-traditional filling (which they liked) and I didn't do the cuts that well since I used a serrated knife instead of a normal knife LOL LOL I thought this was a fair assessment <3<3<3 Their work is 10/10 so I was glad that I had done so well. They are such lovely and giving ladies. A big thank you to Eleni and Afet for your advice and for the wonderful knowledge that you shared so willingly with me. I had a great time. I'm sure that the other members of the forums will appreciate your tips and hints.
Phyllo dough

How thin should you make the phyllo – so that you can see news print through it

Coconut, pistachios, hazelnut, pumpkin, cocoa powder, brown sugar, cherry extract and cocoa powder with a heaping tablespoon of ras el hanout, this is so tasty I LOVED it
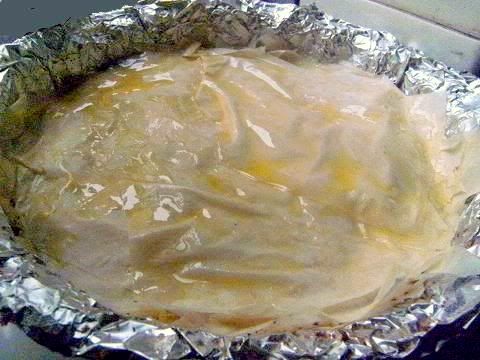
Clarified butter and olive oil used for layering the phyllo pastry, clarified butter gives a crispier result than using normal butter
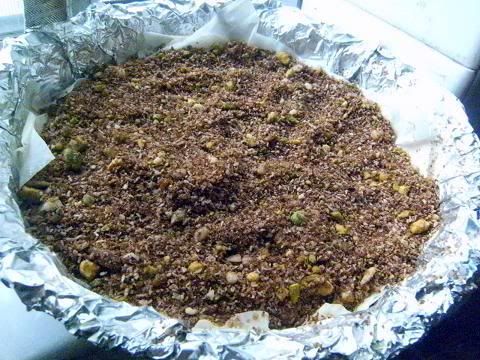
The filling on the phyllo layers
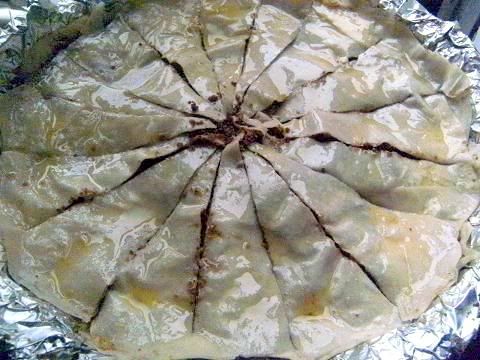
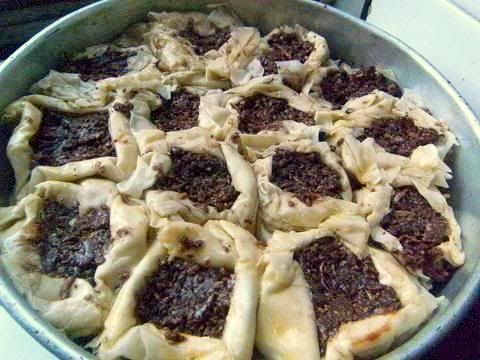
The unbaked baklava
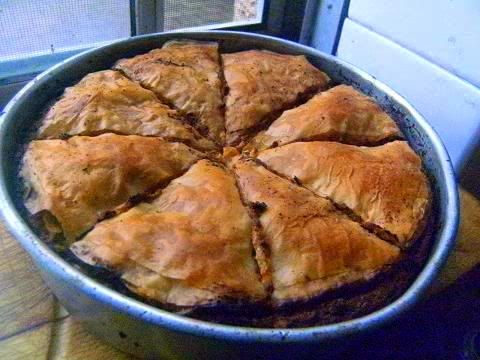
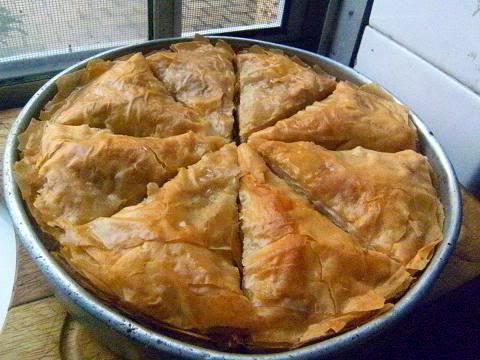
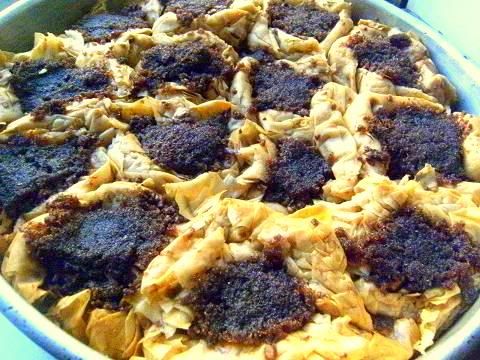
The baked baklava
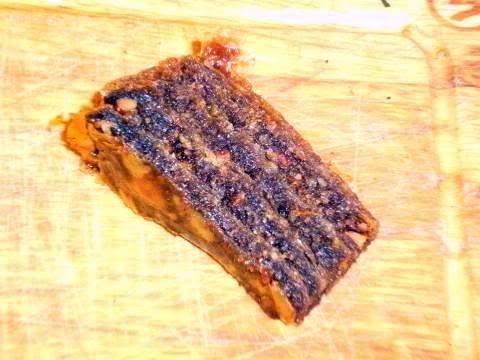
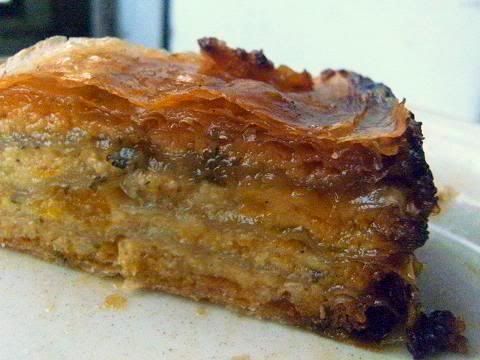
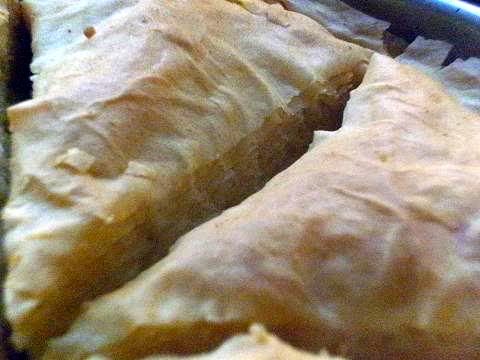
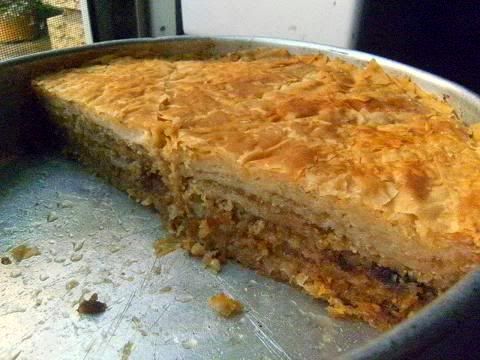
I made one large circular baklava and one small test rectangular which I cut to show you the layering pattern notice how even the different layers are, this slice was cut after a couple of hours
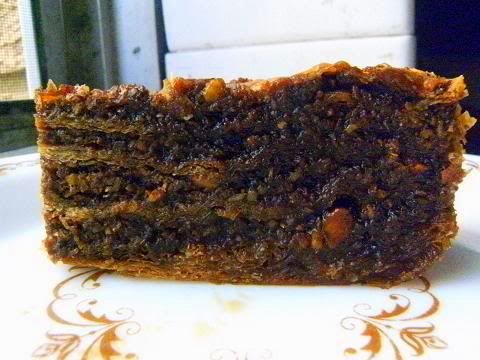
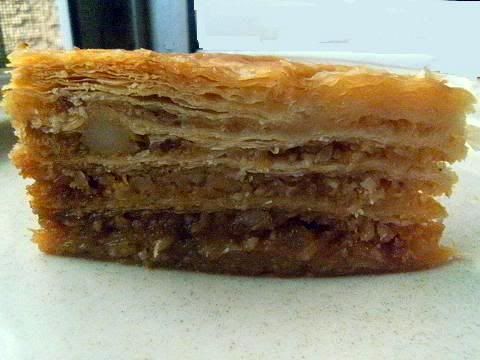
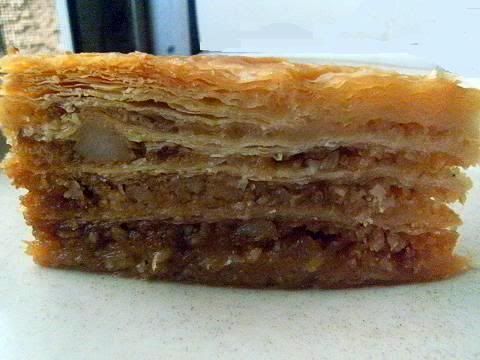
Close up of the slice after overnight resting notice the even layers of filling and phyllo
Tips and hints
1. Use a finely milled flour like “OO” or pizza flour since this will make stretching the phyllo easier.
2. Rest the dough at room temperature for at least two hours longer is better. Oil spray and cover well with plastic wrap when storing.
3. Carefully measure the vinegar in the recipe since the acid in the vinegar softens the gluten in the flour and too much will make the dough too soft and difficult to handle.
4. When you are stretching the dough do it slowly with occasional rests if you are too quick you will tear the gluten strands thereby making holes in the phyllo. Don't worry about a few small holes that is normal.
5. Use clarified butter (ghee) this will enhance the crispiness of the final baklava. You can use a mixture of clarified butter and olive oil (mostly clarified butter with a couple of tablespoons of oil) if you wish, the ladies suggested that the butter/oil mixture helps heat up the baklava better than butter alone so the syrup really sizzles when it is poured on it.
6. Only butter the phyllo sheets lightly with the butter, use a light hand and sweep the butter over the sheet you don't need to coat all of the surface of the sheet. This will give the crispiest phyllo layers also you will achieve maximum raise to your baklava. If you heavily butter each layer the baklava will hold together better and slice more cleanly this method is recommended if you are storing the baklava for any length of time. (If you want maximum lift and separation for the phyllo just butter every second sheet this is good to do for the top-most layer of phyllo which will give you a very crisp top layer for your individual baklava pieces.)
7. Cut the phyllo sheets to the shape of the container, butter and stack the phyllo sheets outside the container and then place the stack on the nut filling in the baking dish. This is the easiest method to do the construction of the baklava this helps give even layers in the final dish. Make sure you firmly push down the phyllo sheet stack onto the filling so there are no air bubbles.
8. For special celebration baklava only slice half way down when making the cuts for the individual pieces then bake this ensures only the top parts will rise and the baklava base will have a slightly denser texture that will not fall apart when picked up with fingers. This gives a better look to the finished individual pieces when served. When the baklava is 3/4 baked you can cut all the way through.
9. Pour firstly (using a jug with a thin nozzle or similar) most of the syrup into the cuts then a little syrup on the tops of the individual pieces this technique ensures optimal flaky crisp pastry tops.
10.You can use other sweeteners apart from honey for example agave nectar, golden syrup, molasses (blackstrap or barbados), sucanat, brown rice syrup, fruit nectars, fruit juice, herbal teas, black tea, green tea and barley malt. Add spices and herbs into the cooling syrup (high temperature syrup can dull the flavours of spices and herbs).
11. Taste the syrup you can add lime/lemon juice to cut back the sweetness. It is important to add 1/2 teaspoon of vinegar or lime or lemon juice to the syrup this will stop the syrup crystallising in the baklava. Do not refrigerate the syrup if it is too cold it will crystallise inside the baklava. The more syrup you use the easier the finished baklava is to handle and cut since the syrup helps bind the layers together keeping it moist and chewy.
12. It was suggested the best baking procedure was – bake for 30 minutes at 390°F (200°C/gas mark 6), then for 30 minutes at 300°F (150°C/gas mark 2), then for 30 minutes at 210°F (100°C/gas mark ¼). Finally, turn the heat back up to 390°F (200°C/gas mark 6) at the end to give the top a good dark golden colour. It is best to use straight-sided baking trays, if the tray is dark coloured line with foil which will stop over-browning of the baklava edges. Remember to rotate the tray throughout the baking time.
13. Make sure the baklava is hot straight from the oven when you add the cooled syrup wait for the sizzle this shows the syrup is being absorbed by the pastry. The hot baklava and the room temperature syrup ensures that the phyllo sheets will be crispy in the finished dish. It will look like too much syrup but it will be absorbed over time. Pour most of the syrup into the cuts then pour the rest evenly over the tops of the pieces.
14. Let the baklava cool to room temperature (this will take a few hours) before covering for storage.
Filling Recipe
1/2 cup desiccated coconut
1/2 cup pistachios
1/4 cup hazel nuts
1/4 cup pumpkin nuts
1/4 cup cocoa powder
1/4 cup brown sugar
1 tablespoon cherry extract
4 teaspoons ras el hanout (see recipe below)
1 teaspoon chilli powder
Syrup
1 cup golden syrup
1 cup brown sugar
1 cup water
2 tablespoons bottled lime juice
2 teaspoons ras el hanout
Ras el Hanout
“Ras el Hanout” ("top of the shop" ) is a spice mixture from Morocco that can contain anywhere from 10-100 different spices. There is no definitive set combination of spices that makes up Ras el hanout. Each shop, company, person have their own secret combination containing over a dozen spices. Typically they would include cardamom, clove, cinnamon, ground chilli peppers, coriander, cumin, nutmeg, peppercorn, and turmeric.
Ingredients
2 teaspoons ground nutmeg
2 teaspoons ground coriander seeds
2 teaspoons ground cumin seeds
2 teaspoons ground ginger powder
2 teaspoons turmeric powder
2 teaspoons ground fennel seeds
2 teaspoons ground mustard seeds
2 teaspoons salt
2 teaspoons cinnamon
2 teaspoons dried Damascan rose petals (optional)
1 1/2 teaspoons sugar
1 1/2 teaspoons paprika
1 1/2 teaspoons ground black pepper
1 teaspoon cayenne pepper powder
1 teaspoon cardamom powder
1 teaspoon ground allspice
1/2 teaspoon ground cloves
Method:
1. Mix all the spices together.
2. Store in an airtight container.
Clarified butter (or ghee as it is called in India) is very easy to make. Just melt the butter slowly. Let it sit for a bit to separate it will form three layers
1. foam on top (there is only a little of this)
2. clarified butter layer (this is thickest layer it is coloured light yellow) and
3. whey (milk solids) on the bottom ( a smallish layer of white liquid).
Skim off the foam that rises to the top, and gently pour the butter off of the milk solids, which have settled to the bottom. A stick (8 tablespoons) of butter will produce about 6 tablespoons of clarified butter.
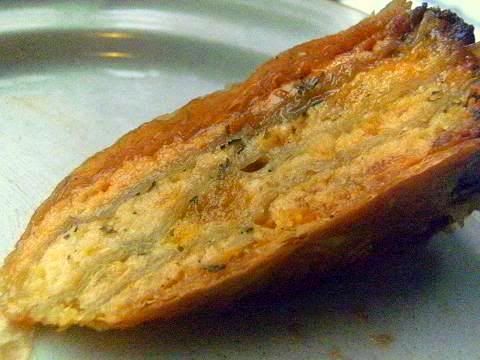
Apricot, peach, orange and white chocolate baklava
I had to do a baklava based on apricots and peaches with white chocolate which is a classic flavour combination. I added dill and cardamom to the filling to add some flavoursome zing also I used some apricot and peach fruit leather cut to size to layer the filling since I had it to hand. If you are doing a nut free baklava it is best just to do phyllo pastry for the base and the top which I did about 12 layers each. For the syrup I used a combination of Chardonnay infused with black tea and orange marmalade with dill seeds and cardamom.
The filling of apricot and white chocolate with freshly-made citrus peel

The freshly baked baklava
The syrup poured onto the freshly baked baklava
The finished baklava

A close-up of the cut baklava, notice the layers of fruit layers
Filling
1 cup dried apricots, finely chopped
1/2 cup white chocolate, finely chopped
1/4 cup of freshly-made lemon and orange peel, peel boiled three times and finely chopped
apricot and peach fruit leather cut to the size of the baking tray I did three layers (optional)
2 tablespoons fresh dill tips, finely chopped
2 teaspoons cardamom seeds, toasted and ground
2 drops of rose extract OR 1/4 teaspoon rose water
Syrup
1 cup orange marmalade
1 cup hot Chardonnay infused with 2 teabags of black tea
1 teaspoon cardamom seeds, toasted and ground
1/2 teaspoon dill seeds
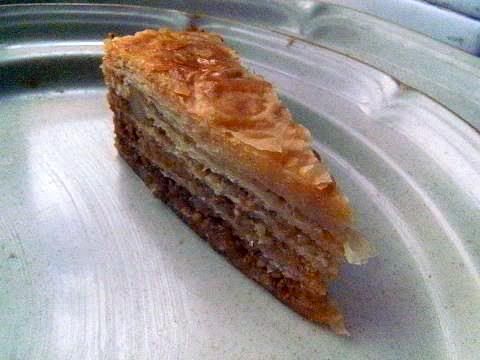
Macadamia Baklava with Pineapple Ginger Syrup
I love macadamia, pineapple and ginger cake so I thought would do a baklava based on this flavour profile.
This baklava is filled with macadamia nuts which have a buttery flavour and a creamy texture this is paired with tangy home-made candied pineapple and some freshly grated ginger. The syrup is made from pineapple juice, freshly grated ginger and white sugar.
I wanted to experiment with the buttering technique for the phyllo layers in this baklava since I wanted the baklava pieces to have even layers and to have a fine finish to the cut edges, I heavily buttered each phyllo sheet for the bottom layer and then for the middle layers I lightly buttered each sheet of phyllo and for the top layer I only lightly buttered every second sheet. I thought this would produce a baklava piece that could be sliced thinly and cleanly and have a slightly denser base that wouldn't fall apart when picked up to be eaten. Also I used a board and a small tin can about 1/2 pound (250 grams) to weigh down the baklava while it was resting overnight this helped keep the layers nice and tight and helped make the slicing easier.
I only cut half way through the baklava at the start of the baking process and when 3/4 baked I cut all the way through.
I made sure that I poured the syrup mostly into the cuts using a jug with a fine nozzle and used a little on top of the individual pieces.
I really liked how this baklava looked when I sliced it after it had soaked overnight. I could slice the big pieces that I had baked in the original baklava into very fine thin slices that had perfectly straight edges and a nice clean tip. Also the texture of the phyllo layers gradually changed from the bottom (most dense and moist) to the top (crisp separate layers) of the slice.
I was most pleased with the flavour profile since macadamina add a lovely base taste of butter while the pineapple and ginger add a nice zingy after-taste to the slice. Overall a good result.
As can be seen you can manipulate the texture of the baklava phyllo layers by using different buttering techniques.
Buttery and creamy macadamia nuts with home-made candied pineapple
The baked baklava
Notice the well separated layers of the phyllo on the top of the baklava
The pouring jug I used
About 10 minutes after I poured the syrup into the cuts and some on the tops
The baklava after overnight soaking
The cut baklava
Notice the difference between the different layers of phyllo
Filling
1½ cups macadamia nuts, lightly roasted and finely chopped
1/4 cup toasted rolled oats
1/4 cup candied pineapple, finely chopped
1/4 cup white sugar
1/2 knob of fresh ginger, grated
Syrup
1½ cups pineapple juice
1/2 knob of fresh ginger, grated
2 tablespoons golden syrup
1 teaspoon vinegar
1/2 cup of white sugar
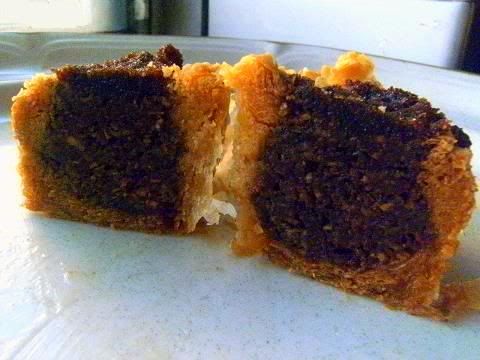
Jaffa Blossom Baklava
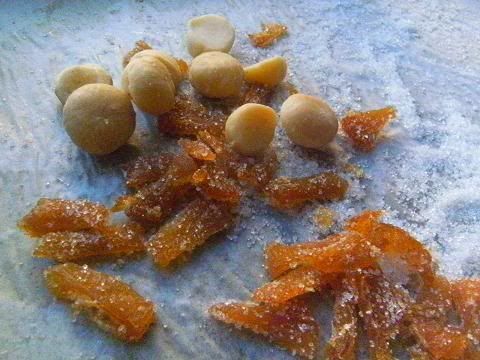
I wanted to make a baklava that consisted of individual pieces where the filling is exposed. The pieces are easy to make, take 1½ tablespoons of Jaffa filling place onto a square of stacked phyllo sheet and fold the phyllo around the filling. The filling is cocoa powder/crystallised orange peel, I adore orange and chocolate (this combination is called Jaffa in Australia) I really like how this worked out, the individual pieces are delicious I like the ratio of crisp phyllo to filling, I used about a dozen layers for the stacked phyllo. The syrup was golden syrup, brown sugar, orange juice and orange blossom water.
Unbaked baklava
Baked baklava
I cut through a piece of the baklava so you can see the ratio of filling to phyllo
36 comments:
Great creativity in your baklava! And what a treat to have such experience helping you out! Thank you for sharing you (and their) helpful hints with us!!
WOW! Audax your baklavas are fabulous! I love your different flavour combinations. I will definitely have to try the tips you got from your neighbours. It must have been a wonderful time baking with such experience.
Wowzas! I had cheesy green baklava for dinner tonight. Some folks would call it spanokopita, but I think cheesy green baklava adds a certain je ne sais quois, n'est-ce pas?
Thanks for all your help with this challenge, as always!
What a tremendous work here! Very professional. Thanks for sharing. Are these baklavas available anywhere?
Wow, that is great job, so creative and looks delicious. And now I´m hungry looking at your photos :)
Homemade phyllo??? WOW! I will leave that hard work for you daring bakers! You should also try Persian rosewater in one of your syrup concoctions. That's what makes Persian baklava different from the Greek (they use honey).
Yum yum! My mouth was watering over every version you made. I love reading your posts! You are so helpful and informative.I bet is is total fun baking with you!
Audax you rocked this challenge too as always. The flavour combinations are amazing, I bet they tasted great. Thanks for sharing all the tips.
Love your baklava Audax! I am thinking I will repeat my attempt again with a traditional filling and use all the rest of the tips you gave to make a lovely flaky phyllo and baklava! I used OO flour, but didn't have the chance to clarify butter, etc.
Stunning as always! I loved your tips read them all before I made the challenge helped me out so much. Thank You
That sizzle when pouring the syrup sure was satisfying! Thank you for sharing the knowledge of your neighbors, it was extremely valuable for this challenge! Your work is by far above and beyond, as usual. You were very creative with the fillings!
Hi Audax! As always, you have so much awesome extra information and variations on the recipe. Thanks for sharing. I linked to your post because I wanted to give you credit for your help in figuring out how thin to roll the dough... and I'll be returning to try some of these extra recipes! :)
What a lovely Baklava..... great flavours :)
Thanks so much for posting such helpful tips on the completed challenge.... You are super :))))))
Chocolate Baklava Laced With Tequila ~ Rolling Phyllo with Daring Bakers
Cheers,
The Variable, Crazy Over Desserts - Nachiketa
Catch me on facebook @ Crazy Over Desserts
I love so much your Baklawas with different flavour combinations. Thanks for sharing all the tips and instructions . Thank you Audrax for your visite and your nice comment.
Grosses bises !
You have been so helpful, as always :-) Your creations are fabulous and the flavor combinations are outrageous! I wasn't able to make the phylo dough that transparent and thin, but it still tasted terrific :-) Congratulations and thanks for all your help!
Wow wow wow - I am literally drooling over your flavour combinations. Particularly intrigued by the white chocolate and dill. I never cease to be amazed by your creativity.
Man, I'm jealous of the personal training you got from your neighbors - that would have been helpful. Nice job on the variety of flavors and styles, they look wonderful.
I've had a lot of homemade baklava over the years, from my Armenian side of the family, and yours looks delicious!
I love the baklava cups that you made!!! And that apricot filling sounds great...thought about doing a raspberry filling but decided to go more traditional. Such fun that you had neighbors to help you with the "real" way to do it. ;-)
All 4 flavours sound amazing, but I'd have a very hard time deciding between the spicy cherry ripe and the pineapple-macadamia one. Oh, or the fruit leather one! They all look perfect, but I must ask how tall they were. Some of them look so tall!
I love all your different versions of the baklava, very creative! The orange and white chocolate one looks especially delicious!
Love all of your versions (though I would have left out the dill). Didn't have time myself this month but will be back next month.
Best, Sandie
I'm jealous that you have neighbors with so much experience. More so that i am at the precision of your layers! }:P
Hello! Haven't visited for a while, but glad I came back today to see this delicious post! I always love all your versions. So creative!
Gorgeous example of the challenge,and thanks you once again for all your input into the forum.
Best wishes from across the Tasman!
Heather
Auckland
What a fabulous example of the challenge, and thanks once again for all your inout onto the forum.
Cheers from Auckland
So lucky of you Audax to have such lovely ladies teaching you the real deal! All your versions look amazing and your post is so full of great tips on this amazing pastry. Thank you so much for sharing all the "secrets" with us!
it's always so interesting to read your posts! you come up with the best flavor combinations! great job on the challenge :)
Fantastic as always, Aud. I'm particularly intrigued by the jaffa. Lucky you to have had people with all that experience to give you tips and help. I had one person and on tip ..cool baklava and hot syrup to prevent a soggy bottom. lol Gorgeous baklavas and photos!
I love the combinations of flavors you have, they must have been wonderful. Also, the work you put into making those layers thin as possible shows, especially in the last one. You can almost count the layers! Great post!
When you do a challenge, you really do it! I can't believe how many different (and totally unique) fillings you did for this challenge. You are truly an inspiration, and your neighbors are the salt of the earth!
Thank you for the wonderful tips in your forum posting--I read them while mine was in the oven, and it truly saved me a headache and a half!
I love most the Jaffa Blossom Baklava version! Delicious!
Cheers
They're all so delicious looking and sounding, especially the white chocolate with stone fruit! I'd read that you stretched the dough on a sheet, and I wish I'd had time to do that--rolling the sheets out was a literal pain and left my hands a little tingly. Come to think of it, stretching it may have gone more quickly. Thanks for all the awesome tips and variations, Audax!
Dear Audax,
is it possible for you to give me the name of the compagny who's making the incredible beet chips in Australia?
Thank you
you can answer me on my email adress : fanypois@hotmail.com
Wow Wow Wow!!! how gorgeous are your baklavas?! Love the sound of pineapple/ginger/macadamia baklava especially. do you still have any to share?!
That picture of your dough with newsprint showing through is great. Bravo all around!
Rumor confirmed! The new gourmet food market, Bon edpillsbritain.com Vivant Market & Cafe, is scheduled to open this Fall 2011.
Post a Comment